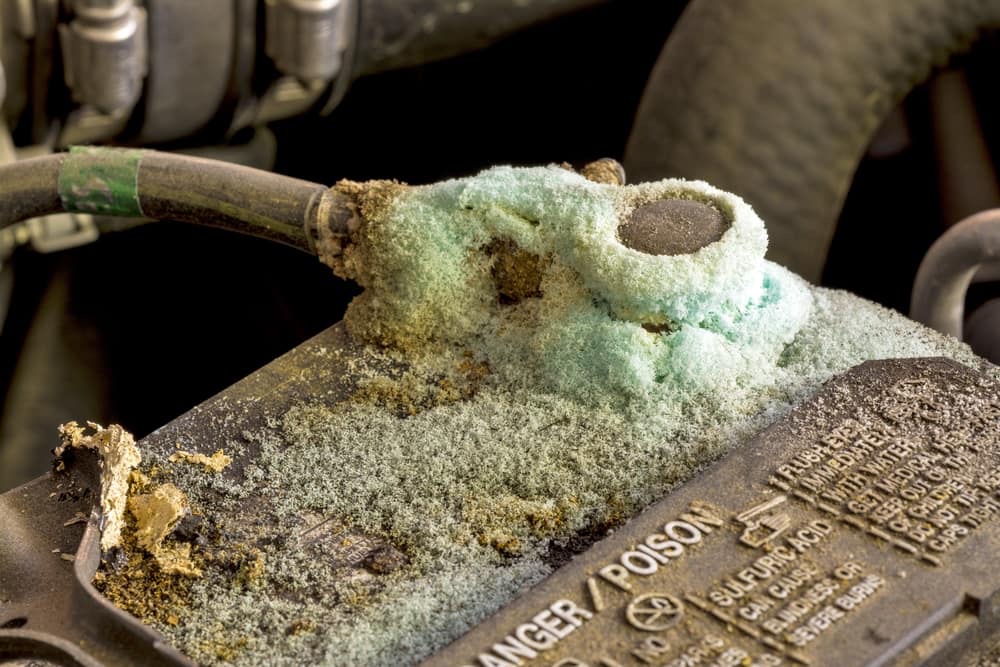
Have you ever tried to jumpstart your vehicle, only to notice that you could barely see your battery terminal underneath all the gunk? That ‘gunk’ is battery corrosion, a chemical reaction that occurs when hydrogen gas released from the battery acids reacts with the terminals.
Since this reaction is caused by acid, a simple chemical solution should be sufficient to do the cleaning trick. In fact, you can use a common household item like baking soda to easily clean away battery acid! Regardless, safety precautions must still be followed to avoid accidents.
This article will provide you with step-by-step instructions on how to clean the battery while keeping safe.
Supplies Needed
First, you will need to gather a few supplies for this project. You may already have most of these items in your home, so double-check before going to the store.
- Safety glasses or goggles
- Rubber gloves for protecting your hands
- Solution of baking soda mixed with water (approximately one heaping tablespoon to each pint of water)
- Adjustable pliers with insulated handles
- A small, stiff-bristled brush (an old toothbrush will work fine!)
- Screwdrivers with insulated handles
- Special battery tools, including a cable puller and cable terminal cleaning brushes
- Assorted small open-end and box wrenches
- A small metal or plastic scraper
- All-purpose household cleaner in a spray bottle
- Sponges or clean cloths
- A turkey baster or small funnel
- A source of ample clean water such as a garden hose or a large bucket and sponge
Safety first
Before getting ready to clean the battery there are a few safety tips to keep in mind. To begin with, safety glasses and gloves must be worn. It is especially important to protect your eyes and skin from sulfuric acid that can linger in the corrosion deposits.
Furthermore, this substance can eat away at your car’s paint, therefore keep it away from that as well. Also, keep in mind, you may need to take out the battery to thoroughly remove severe corrosion and dirt.
Cleaning steps:
The amount of dirt and corrosion may differ from one battery to another, so cleaning will vary. Given that, some of the below steps may or may not need to be performed.
1. Remove visible corrosion
Start by scraping off any white or greenish corrosion deposits with the stiff-bristled brush or, small metal or plastic scraper.
2. Apply baking soda solution
Next, carefully apply the baking soda solution using the turkey baster or small funnel to the outside of the battery and its cable connections. You can use your brush to work the solution into the heavily corroded areas.
3. Disconnect cables & terminals (if needed)
If you find that the cable clamps or terminals are badly corroded at the battery, you can disconnect them for easier cleaning. For this, you may need to use various wrenches, pliers, and a small battery cable puller to disconnect them. Do not forget to disconnect the negative first, followed by the positive.
4. Remove remaining corosion
Use your brush or battery cable scrapers to dislodge the corrosion from the terminals, and battery posts, and hold down clamps and brackets. In addition, flush these parts with the baking soda solution to rid them of any trace of corrosion.
5. Clean battery
After that, wash the outside of the battery, the hold-down parts, and the cable ends with a liquid cleaner in a spray bottle. Use a sponge or rag to get off any remaining grease or dirt. When everything is clean, dry off the battery and all its parts with a dry cloth or rag.
6. Reinstall
The last step is just reinstalling the battery and tightening everything, so it is secure. Reconnect the battery in the reverse order, positive cable first.